

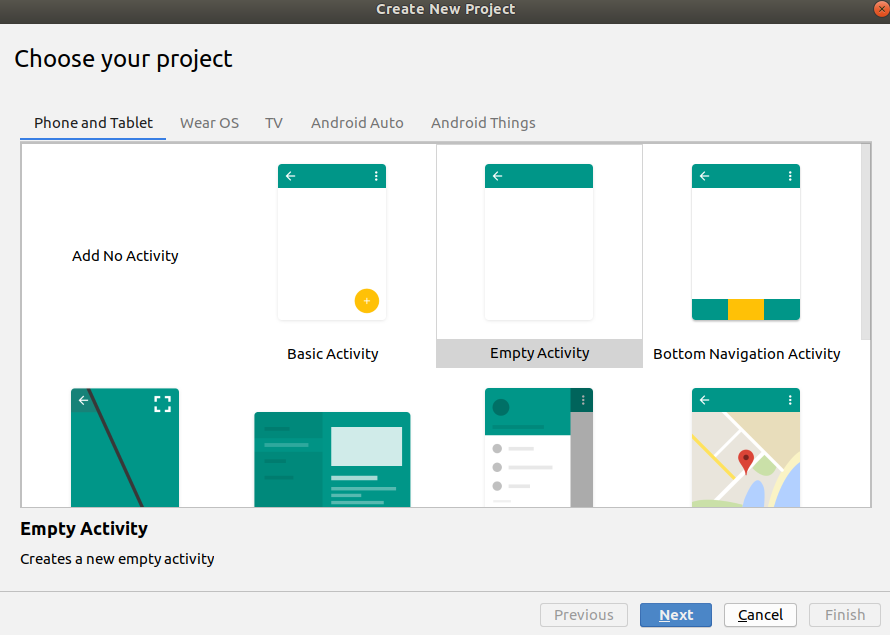
- Firstly let's get started by creating a new project in Android Studio. Select Empty Activity and click on next.
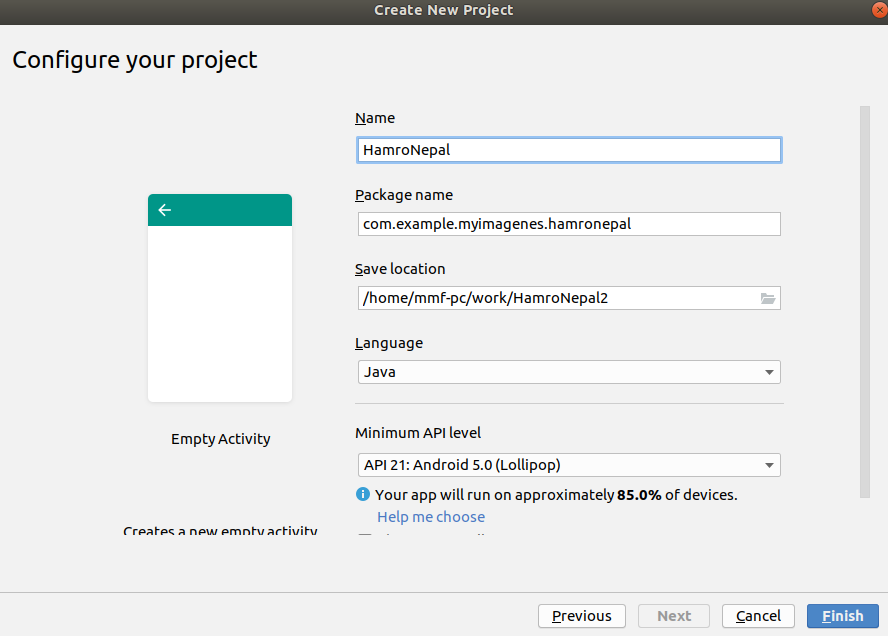
- Select the name of the project and make sure to use a unique name for the package name then select the language as Java and then select the minimum API level.
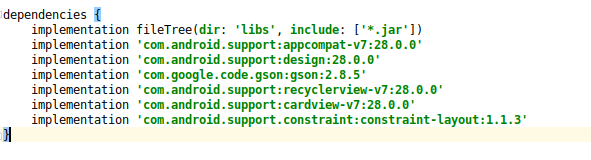
- Since we are working with RecyclerView we need to add RecyclerView in our dependency file in
(Module:app) build.gradlefile as follow.
implementation 'com.android.support:recyclerview-v7:28.0.0'
  implementation 'com.android.support:cardview-v7:28.0.0'
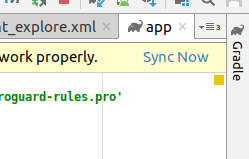
After adding the dependencies click the button sync now
Now, wait for the file to get build. After the project is built successfully then let us start with our activity_main.xml file.
- Firstly add a RecyclerView in activity_main.xml file and now it should look like this.
<?xml version="1.0" encoding="utf-8"?>
<android.support.constraint.ConstraintLayout xmlns:android="http://schemas.android.com/apk/res/android"
    xmlns:app="http://schemas.android.com/apk/res-auto"
    xmlns:tools="http://schemas.android.com/tools"
    android:layout_width="match_parent"
    android:layout_height="match_parent"
    tools:context=".MainActivity">

    <FrameLayout
        android:id="@+id/fragment_container"
        android:layout_width="match_parent"
        android:layout_height="match_parent"/>
</android.support.constraint.ConstraintLayout>
(activity_main.xml)
- Now let us create a new fragment in layout and name it fragment_explore.
RightClick on package -> new -> fragment -> with(viewModel). Then add recyclerView in the fragment. The fragment_explore.xml should look like this.
<?xml version="1.0" encoding="utf-8"?>
<android.support.constraint.ConstraintLayout xmlns:android="http://schemas.android.com/apk/res/android"
    android:layout_width="match_parent" android:layout_height="match_parent">
    <android.support.v7.widget.RecyclerView
        android:id="@+id/exploreRecyclerView"
        android:layout_width="match_parent"
        android:layout_height="match_parent"
        android:scrollbars="vertical"
        />
</android.support.constraint.ConstraintLayout>
(fragment_explore.xml)
- Now create a new Layout and name it explore_list.
Right click on the layout -> new -> layout resource file select name and then click on ok.
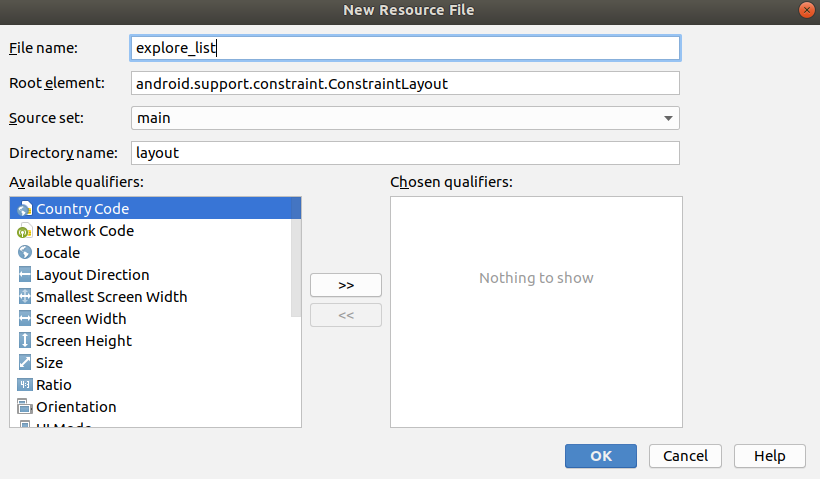
- Now add the following to explore_list.xml file.
<?xml version="1.0" encoding="utf-8"?>
<android.support.v7.widget.CardView xmlns:android="http://schemas.android.com/apk/res/android"
    xmlns:tools="http://schemas.android.com/tools"
    android:layout_width="match_parent"
    android:layout_height="wrap_content"
    xmlns:app="http://schemas.android.com/apk/res-auto"
    app:cardCornerRadius="4dp">
    <android.support.constraint.ConstraintLayout
        android:layout_width="match_parent"
        android:layout_height="match_parent"
        android:layout_margin="4dp">
        <ImageView
            android:id="@+id/imageView"
            android:contentDescription="Image"
            android:layout_width="80dp"
            android:layout_height="80dp"
            android:layout_marginStart="8dp"
            android:layout_marginTop="8dp"
            android:layout_marginBottom="8dp"
            android:padding="2dp"
            app:layout_constraintBottom_toBottomOf="parent"
            app:layout_constraintStart_toStartOf="parent"
            app:layout_constraintTop_toTopOf="parent"
            tools:srcCompat="@tools:sample/backgrounds/scenic" />
        <TextView
            android:layout_width="wrap_content"
            android:id="@+id/textView"
            android:layout_height="wrap_content"
            android:layout_marginEnd="8dp"
            android:text="Test"
            android:textSize="20sp"
            app:layout_constraintBottom_toBottomOf="@+id/imageView"
            app:layout_constraintEnd_toEndOf="parent"
            app:layout_constraintStart_toEndOf="@+id/imageView"
            app:layout_constraintTop_toTopOf="@+id/imageView"
            android:textStyle="bold"
            android:textColor="@android:color/black"/>
    </android.support.constraint.ConstraintLayout>
</android.support.v7.widget.CardView>
(explore_list.xml)
- Create a new class ExploreList.java. This class will contain the lists of images and text for the list of RecyclerView. ExploreList class will look like this. I've added a few icons in the drawable folder for the reference of images.
package com.example.myimagenes.hamronepal;

public class ExploreList {
   public static String[] text = new String[]{
           "First", "Second", "Third", "Fourth", "Fifth", "Sixth", "Seventh", "Eighth", "Nineth", "Tenth"
   };
   public  static  int[] images = new int[]{
           R.drawable.ic_contacts_black_24dp,
           R.drawable.ic_face_black_24dp,
           R.drawable.ic_home_black_24dp,
           R.drawable.ic_contacts_black_24dp,
           R.drawable.ic_face_black_24dp,
           R.drawable.ic_home_black_24dp,
           R.drawable.ic_contacts_black_24dp,
           R.drawable.ic_face_black_24dp,
           R.drawable.ic_home_black_24dp,
           R.drawable.ic_home_black_24dp
    };
}
- Create a new class ListAdapter.java This class will set values for items in RecyclerView. Whenever recycler view will call ListAdapter it will return a new item for that view. The ListAdapter class will look like this.
package com.example.myimagenes.hamronepal;

import android.support.annotation.NonNull;
import android.support.v7.widget.RecyclerView;
import android.util.Log;
import android.view.LayoutInflater;
import android.view.View;
import android.view.ViewGroup;
import android.widget.ImageView;
import android.widget.TextView;

public class ListAdapter extends RecyclerView.Adapter {

    @NonNull
    @Override
    public RecyclerView.ViewHolder onCreateViewHolder(@NonNull ViewGroup viewGroup, int i) {
        View view = LayoutInflater.from(viewGroup.getContext()).inflate(R.layout.explore_list, viewGroup, false);
        return  new ListViewHolder(view);
    }
    @Override
    public void onBindViewHolder(@NonNull RecyclerView.ViewHolder viewHolder, int i) {
        ((ListViewHolder) viewHolder).bindView(i);
    }
    @Override
    public int getItemCount() {
        return ExploreList.text.length;
    }
    private class ListViewHolder extends  RecyclerView.ViewHolder implements View.OnClickListener {
        private TextView mTextView;
        private ImageView mImageView;
        public ListViewHolder(View view){
            super(view);
            mTextView = view.findViewById(R.id.textView);
            mImageView = view.findViewById(R.id.imageView);
            view.setOnClickListener(this);
        }
        public void bindView (int position){
            mTextView.setText(ExploreList.text[position]);
            mImageView.setImageResource(ExploreList.images[position]);
        }
        public void onClick(View view){
            Log.d("Some Tag", "Clicked: " + view.toString());
        }
    }
}
- Add the following code in ExploreFragment java class.
package com.example.myimagenes.hamronepal;

import android.os.Bundle;
import android.support.annotation.NonNull;
import android.support.annotation.Nullable;
import android.support.v4.app.Fragment;
import android.support.v7.widget.LinearLayoutManager;
import android.support.v7.widget.RecyclerView;
import android.view.LayoutInflater;
import android.view.View;
import android.view.ViewGroup;

public class ExploreFragment extends Fragment {
    @Nullable
    @Override
    public View onCreateView(@NonNull LayoutInflater inflater, @Nullable ViewGroup container, @Nullable Bundle savedInstanceState) {
        View view =  inflater.inflate(R.layout.fragment_explore, container, false);
        RecyclerView recyclerView = view.findViewById(R.id.exploreRecyclerView);

        //creating object of List adapter
        ListAdapter listAdapter = new ListAdapter();
        //Setting adapter of recyclerview by object listadapter
        recyclerView.setAdapter(listAdapter);
        //Creating a layoutmanager
        RecyclerView.LayoutManager layoutManager = new LinearLayoutManager(getActivity());
        //Setting a layout manager
        recyclerView.setLayoutManager(layoutManager);
        return view;
    }

}
- Now let's make the following changes in MainActivity class.
package com.example.myimagenes.hamronepal;

import android.support.annotation.NonNull;
import android.support.design.widget.BottomNavigationView;
import android.support.v4.app.Fragment;
import android.support.v7.app.AppCompatActivity;
import android.os.Bundle;
import android.view.MenuItem;

public class MainActivity extends AppCompatActivity {
    @Override
    protected void onCreate(Bundle savedInstanceState) {
        super.onCreate(savedInstanceState);
        setContentView(R.layout.activity_main);
        BottomNavigationView bottomNav = findViewById(R.id.bottom_navigation);
        bottomNav.setOnNavigationItemSelectedListener(navListener);
        getSupportFragmentManager().beginTransaction().replace(R.id.fragment_container, new HomeFragment()).commit();
    }
}
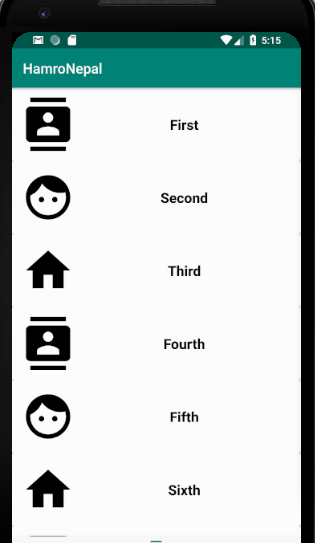
The Final output will look like this.
Summary
We completed the followings:
- Adding dependencies
- Adding RecyclerView and CardView in our layout files.
- Added a fragment
- Created Adapter which would return an item to the RecyclerView.
💌 If you'd like to receive more tutorials in your inbox, you can sign up for the newsletter here.
System Design Series
- Why is System Design Important?
- Architecture and Design Principle for Online Food Delivery System
- Building Real-time Applications with Redis Pub/Sub
- Understanding Proxies: The Differences Between Forward and Reverse Proxies
- Eventual Consistency vs Strong Consistency: Distributed Systems
Please let me know if there's anything else I can add or if there's any way to improve the post. Also, leave a comment if you have any feedback or suggestions.
Discussions