
Sometimes, when I needed to update the Node.js version on a Netlify site, I found myself having to look up the steps again. To avoid this in the future, I decided to create a quick how-to guide for myself as a personal reference.
To set your Node.js version in Netlify, you can follow these steps:
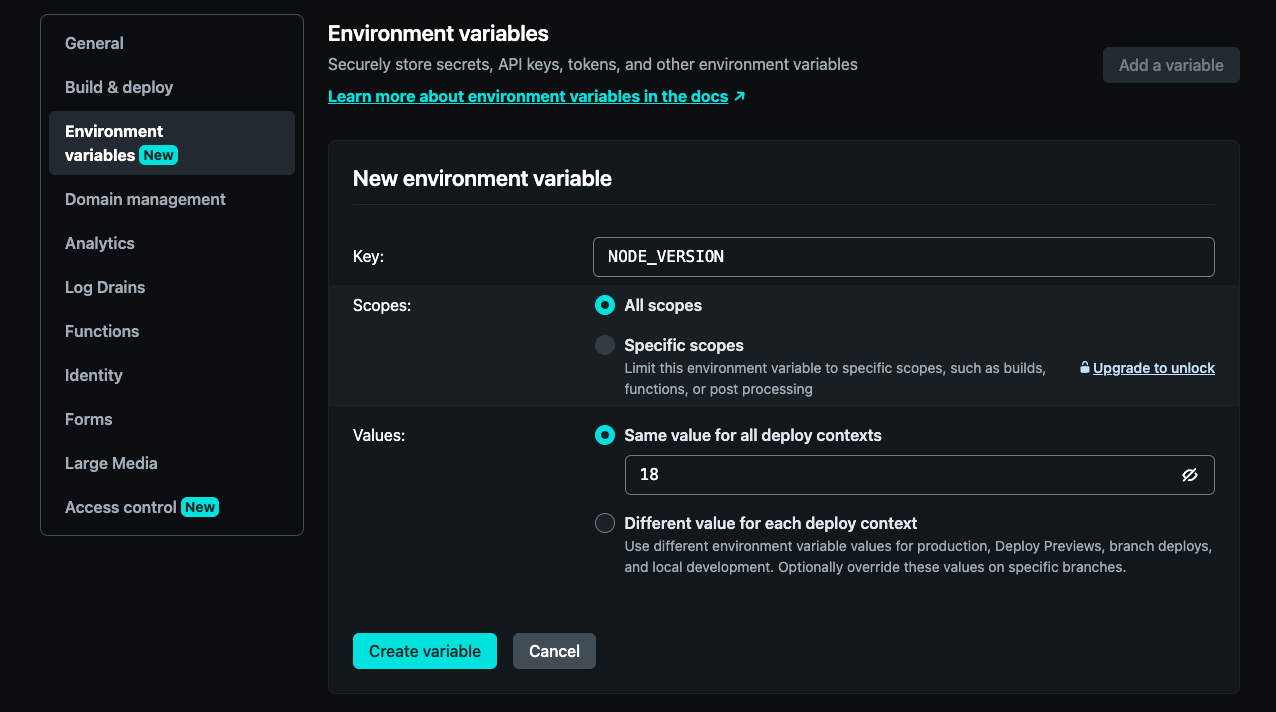
- Go to your Netlify site dashboard and click on Site settings.
- Scroll down to the Environment variables section and click on Add a vaiable.
- Enter NODE_VERSION as the key and the version of Node.js you want to use as the value. For example, if you want to use Node.js version 18, enter 18 as the value.
- Click on Create vaiable to save the environment variable.
Note: The netlify UI may change over the time. If you find any differences please let me know in the comment section.
Netlify will now use the specified version of Node.js for building and deploying your site. You can verify the Node.js version in the Netlify build logs or by running the node -v command in a build script.
💌 If you'd like to receive more tutorials in your inbox, you can sign up for the newsletter here.
Please let me know if there's anything else I can add or if there's any way to improve the post. Also, leave a comment if you have any feedback or suggestions.
Discussions