How to Add Google Tag Manager to Your Next.js Blog for Performance Tracking?
In this tutorial, you'll learn how to add Google Tag Manager to your Next.js blog to track website performance effectively.
Setting Up Your Blog Site
First, create a new blog site using the Next.js blog template. I recommend the Tailwind Next.js Starter Blog. I used this template to create a blog for my website Paragliding in Nepal.
To get started, clone the repository from GitHub. Click on "Use this template" and choose "Create a new repository" as shown in the screenshot below.
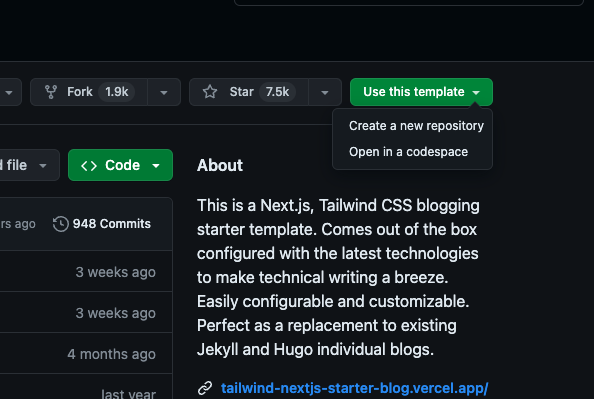
After creating the repository, clone it to your local system with the following command:
git clone git@github.com:<your_user>/<repo_name>.git
Navigate to the project directory and install the dependencies:
yarn install
To verify everything is running correctly, start the development server:
yarn run dev
Your blog site should now be running on http://localhost:3000. Once confirmed, proceed to add Google Tag Manager to track your website's performance.
Setting Up Google Analytics
Before integrating Google Tag Manager, set up Google Analytics. Go to Google Analytics and navigate to the Admin menu in the sidebar.
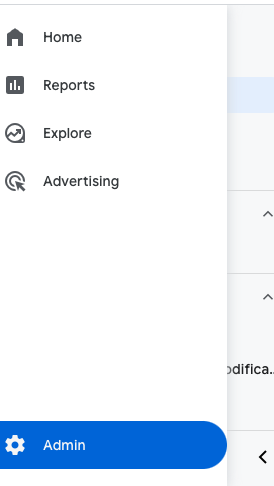
Click on "Create" and then choose "Property."
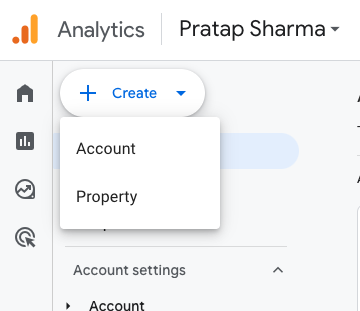
If you haven't created an account yet, follow the guide in Google Analytics and then proceed with the steps below.
Complete the required fields:
- Property Name
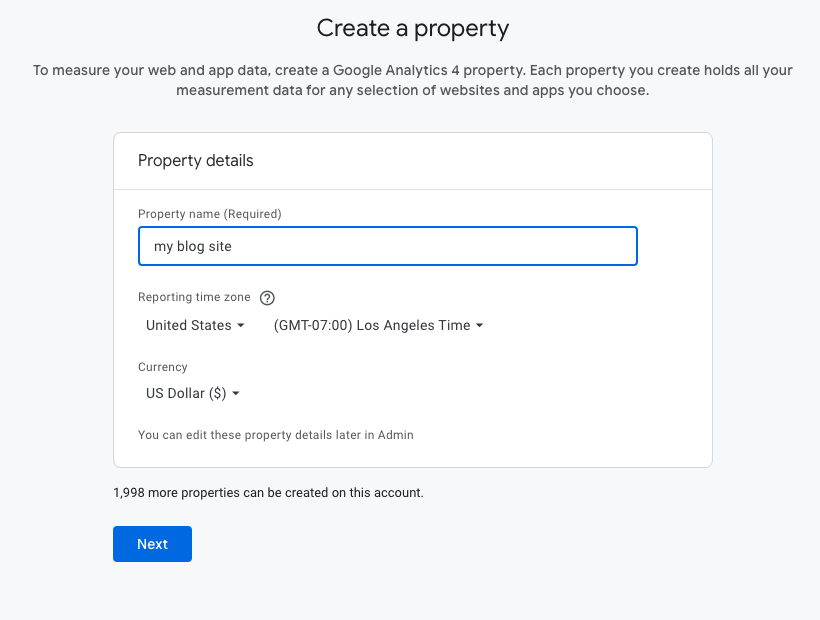
- Business Size

- Business Objectives

- Platform Selection

Since we are building a blog site, select "Web" and enter the website URL and stream name. Leave everything as default and click on Create & Continue.

After this, a popup will appear. Select "Set up a Google Tag" and choose "Manual Installation." Follow the instructions to add the provided code to the <head> element of your website.
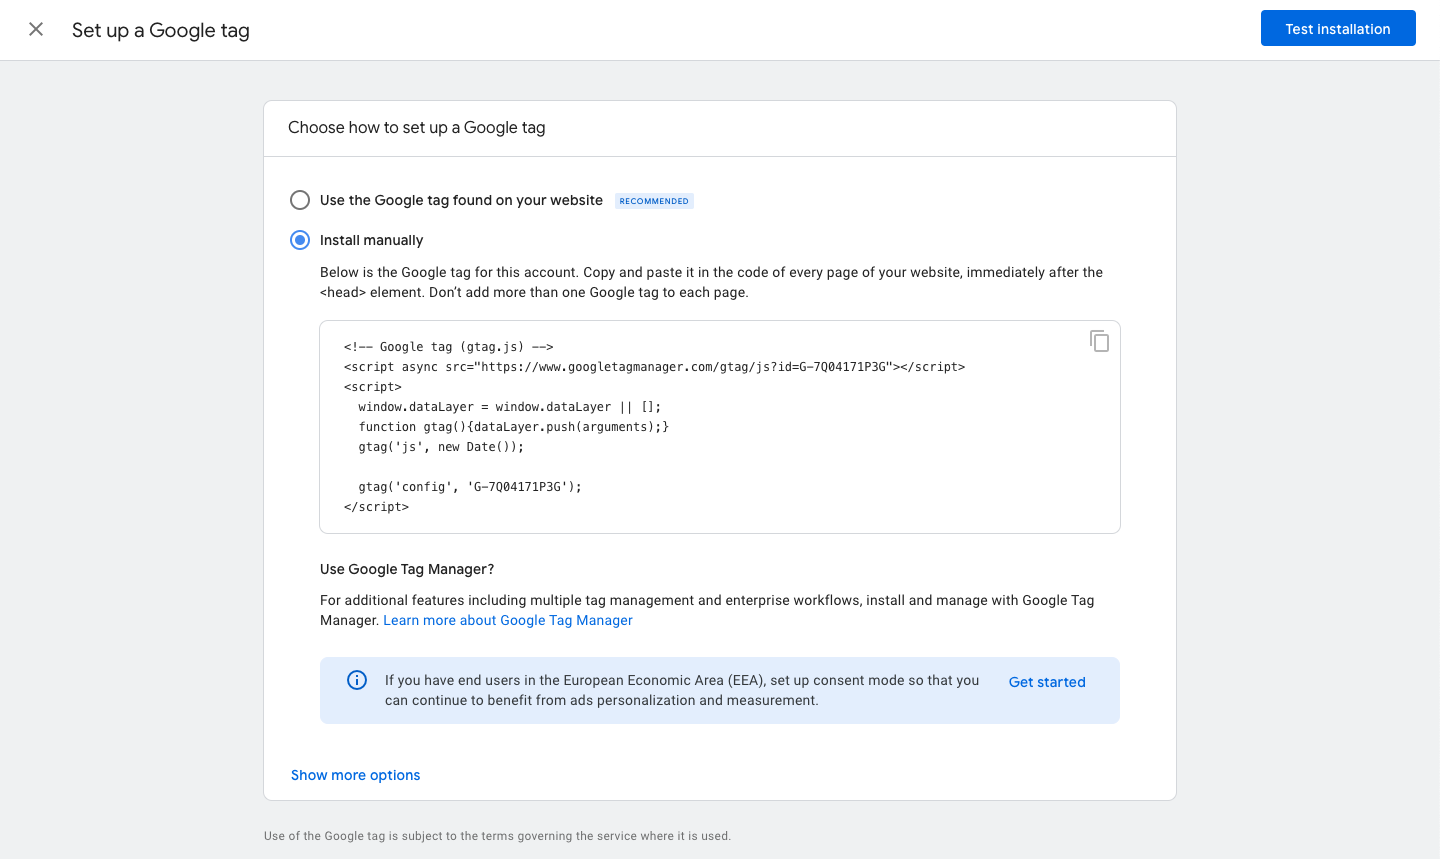
Integrating Google Tag Manager in Next.js
Open the layout.tsx file located in the app folder of your project. Install the next/script package:
yarn add next/script
Import the Script component and add the Google Tag Manager code as shown below:
+import Script from "next/script";

export default function RootLayout({
  children,
}: {
  children: React.ReactNode;
}) {
  return (
    <html
      lang={siteMetadata.language}
      className={`${space_grotesk.variable} scroll-smooth`}
      suppressHydrationWarning
    >
+      <head>
+        <Script
+          async
+          src="https://www.googletagmanager.com/gtag/js?id=G-ABCDJSJ"
+        />
+        <Script id="google-analytics">
+          {`window.dataLayer = window.dataLayer || [];
+          function gtag(){dataLayer.push(arguments);}
+          gtag('js', new Date());
+
+          gtag('config', 'G-ABCDJSJ');
+          `}
+        </Script>
+      </head>
      <body className="bg-white pl-[calc(100vw-100%)] text-black antialiased dark:bg-gray-950 dark:text-white">
        <ThemeProviders>
          <SectionContainer>
            <div className="flex h-screen flex-col justify-between font-sans">
              <SearchProvider
                searchConfig={siteMetadata.search as SearchConfig}
              >
                <Header />
                <main className="mb-auto">{children}</main>
              </SearchProvider>
              <WhatsAppFab />
              <Footer />
            </div>
            <VercelAnalytics />
          </SectionContainer>
        </ThemeProviders>
      </body>
    </html>
  );
}
Replace G-ABCDJSJ with your actual Google Tag Manager ID. This integration allows you to track your blog's performance using Google Analytics.
Checking Your Analytics
To view your analytics data, go to Google Analytics and monitor the performance metrics for your website.
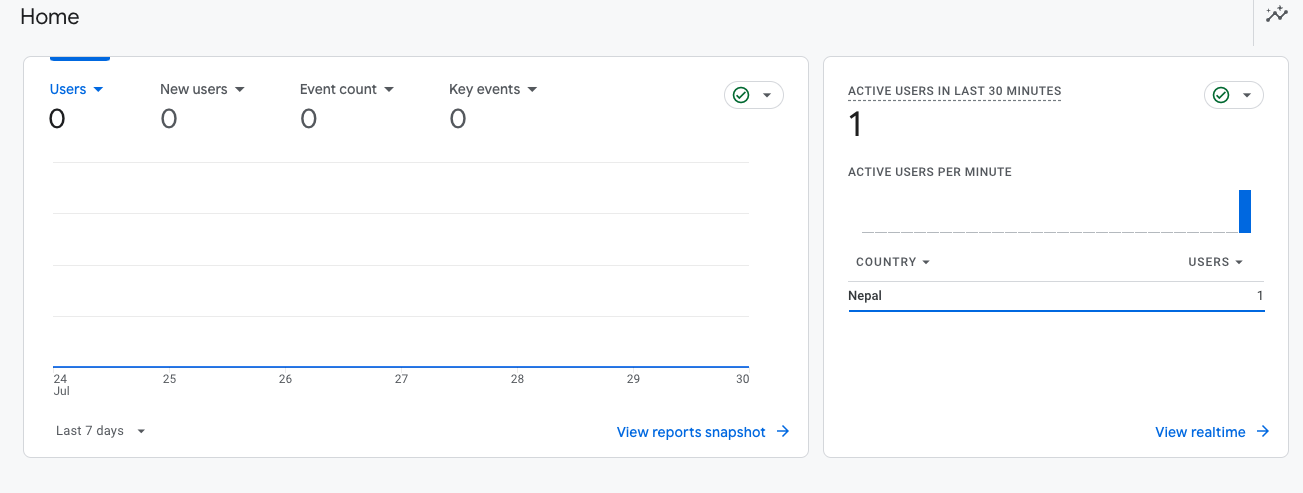
By following these steps, you have successfully added Google Tag Manager to your Next.js blog. Now you can track and analyze the performance of your site to make informed decisions.
Learn More
- Unit Testing for Express API: A Step-by-Step Guide
- A practical guide to data collection with OpenTelemetry, Prometheus and Grafana
- Flask and SQLAlchemy: Better Data Management
Please let me know if there's anything else I can add or if there's any way to improve the post. Also, leave a comment if you have any feedback or suggestions.

Discussions